
It is difficult to predict how a website will perform in the future.
It may not always be feasible to continue maintaining two websites. Or, you might want to merge an acquired website into your main website to maximize the benefits. SEO benefits. Then this guide is right for you.
We will walk you through merging two WordPress websites together, while also ensuring that SEO doesn’t become an afterthought.
Some of you might have a question before we start. When would you merge two websites and why?
Why merge two WordPress sites together?
You can have many reasons for doing it. You might want to, for example. start as a blogger You can merge old content. You can now keep all your content in a single location.
There are several valid reasons to merge your websites. If you’ve ever considered merging your websites, here are a few reasons why it might make sense.
- You’re thinking about merging the content of one of your blogs with another blog because it’s not performing as well as you expected.
- You have accidentally neglected an older website for some time and it no longer performs well. You don’t want to manage multiple WordPress websites.
- You have just acquired another blog or website and you want to transfer the content to your website to benefit from SEO.
Before I start a new blog, I consider merging two WordPress sites together. This allows me to stay on track and not waste the time, money and effort that went into the previous content.
So now, without further ado – let’s jump right in and take a look at how you can merge your two WordPress websites together today:
Step 1: Export your old WordPress content
First, export your WordPress site as an XML document.
You can do this using the WordPress export feature. First, you will need to access the old dashboard.
Select “Export” from the “Tools” menu.
You will now need to select the content that you wish to export. We recommend selecting the “All content”. This option exports all content, including posts, pages and layouts.
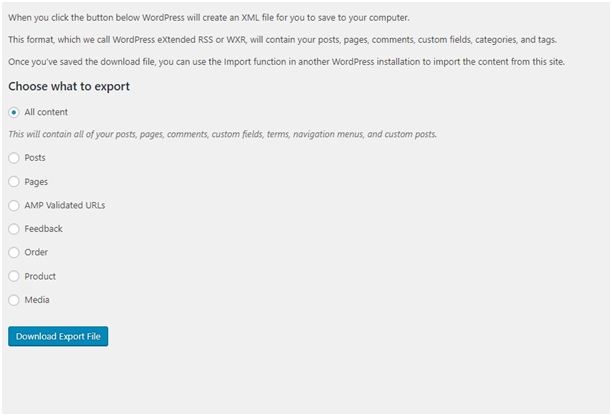
You can start the export process once you click “Download Export File”. Once the process is complete, you’ll get an “Extensible Markup Language” (XML). The XML files contains the stripped down versions of your content. It does not contain any images. Don’t worry. We will review the image backup in a few days.
Step 2: Importing a newly created XML document
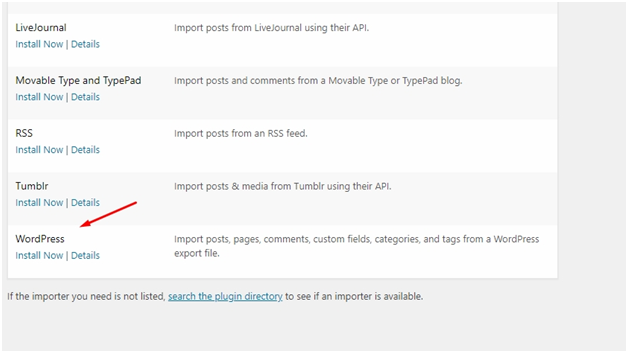
To import this newly created XML into your WordPress website/blog, you will need to go to “Tools” and then to the “Import” tab. You will need to click on “Tools”, then the “Import tab”. The “WordPress option” will appear. You only need to click the “Install Now”.
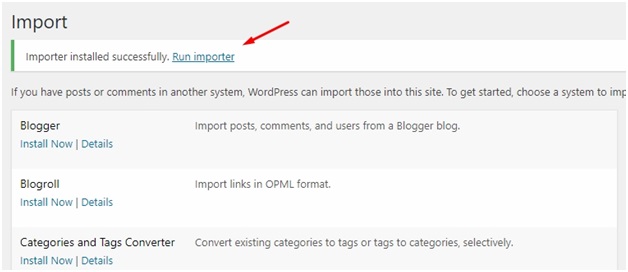
You will then see a pop-up message saying “Importer successfully installed”. Run Importer”
You will now be asked to select a file. It will import the entire text content. This includes posts, custom field, categories, etc.
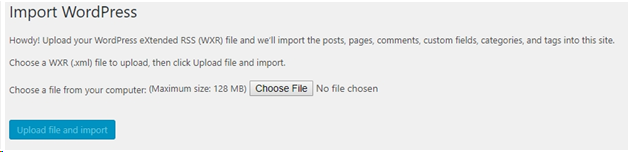
Click “Choose File”, then “Upload File and Import.” If all goes well, you’ll be directed to a page where you can assign a user.
Step 3: Assigning new users
The content uploaded to the WordPress blog must have an associated author or user. WordPress will ask you to assign One for it
This step is mandatory. It is mandatory to assign new content either to an existing user, or to create an author who will be assigned the content.
This prompt will only appear once. If you’re unsure, assign the author to your admin user and change it to another user later if it is for editing purposes.
You can also keep the original author information intact by not adding a new author. This will ensure that all necessary details are kept.
Step 4: Creating URL Redirects
This is necessary to redirect all imported content. This is important as it will allow Google to find the old content and redirect them to the new website. We are writing this guide with SEO as a priority, so it is vital that you do not skip this step. You will not only lose potential traffic if you don’t do a proper URL redirect but you may also lose your website. lose the SEO ranking Associated with the content.
Use an FTP program such as FileZilla to get started. Go to the root of your old WordPress site and look for the.htaccess.
Open the.htaccess and paste in the code below.
#Options +FollowSymLinks
RewriteEngine is a powerful tool that allows you to write code.
RewriteRule*)$ http://www.newwordpressblog.com/$1 [R=301,L]
This code will implement 301 redirections. You will not lose your SEO rankings if you use 301 redirections. You may see a slight drop in the ranking of your site.
Make sure you replace the URL of your old website with the new WordPress site in the code above. You are now done. Your old website traffic is now being redirected to the new site.
Step 5: Import Images
The final step is to import the images. Here’s how to do it manually.
You will need to use a FTP program such as Filezilla to download the files. The root directory will be located. Find it using the usual names public_html or http://www. Then, locate the media files that will be needed for upload.
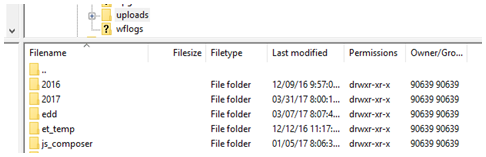
You can find the media files that you need to upload in the wp content/uploads directory. The next step is to upload your files to the new blog. Now, the downloaded files are uploaded to your FTP client.
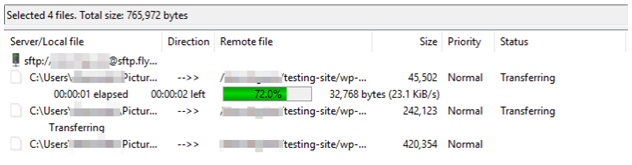
Replace the links to your images. You can use “Search and Replace”, a plugin, to assist you with replacing links. This will allow you to quickly learn the process.

That’s it! You’ve successfully merged your two WordPress sites without losing any SEO.
What do you make of this tutorial? You were able to merge your WordPress blogs successfully? Please let us know what you think by commenting below. Do not forget to share this content with your friends.