
When you want to publish a blog on your WordPress site or create a new page for it, always add images to grab the attention of visitors.
What do you do if the size of the image is too small to fit in the section?
Obviously, it will need to be resized to fit. Many people do. You may be losing quality They don’t know how to properly resize their images without compromising quality.
We’re here to guide you along this journey. You won’t need to worry about pixelated pictures anymore due to resizing issues.
GIMP is a free software everyone can use, so we’ll show you how to resize images without losing any quality. We understand that not everyone can afford Photoshop. That’s why we will show you how to do this with GIMP.
GIMP is basically a free Photoshop version, but without all of the bells. Use it 100% for free Some people prefer it to Photoshop, because it is simpler and less confusing.
Let’s begin!
How to resize images using GIMP
You need to follow a few simple steps. resize your images You will need to learn the GIMP process to use it, but after you are comfortable with it you won’t need to repeat it to get it correct.
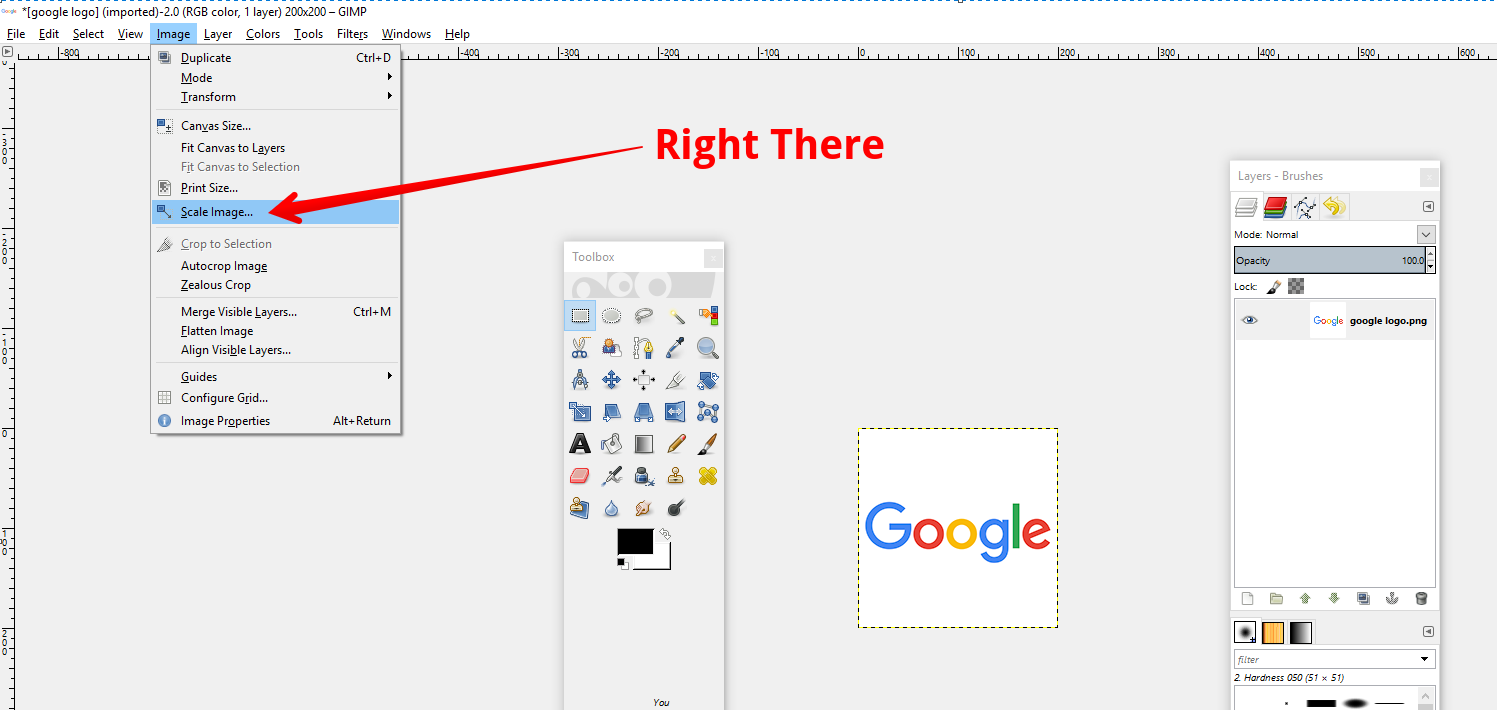
1 Then click “Scale Image”.
The Image menu can be found in the top bar menu. When you hover your mouse over it, a drop down menu will appear. You can find “Scale Image” there. Please refer to the image below if you cannot find it.
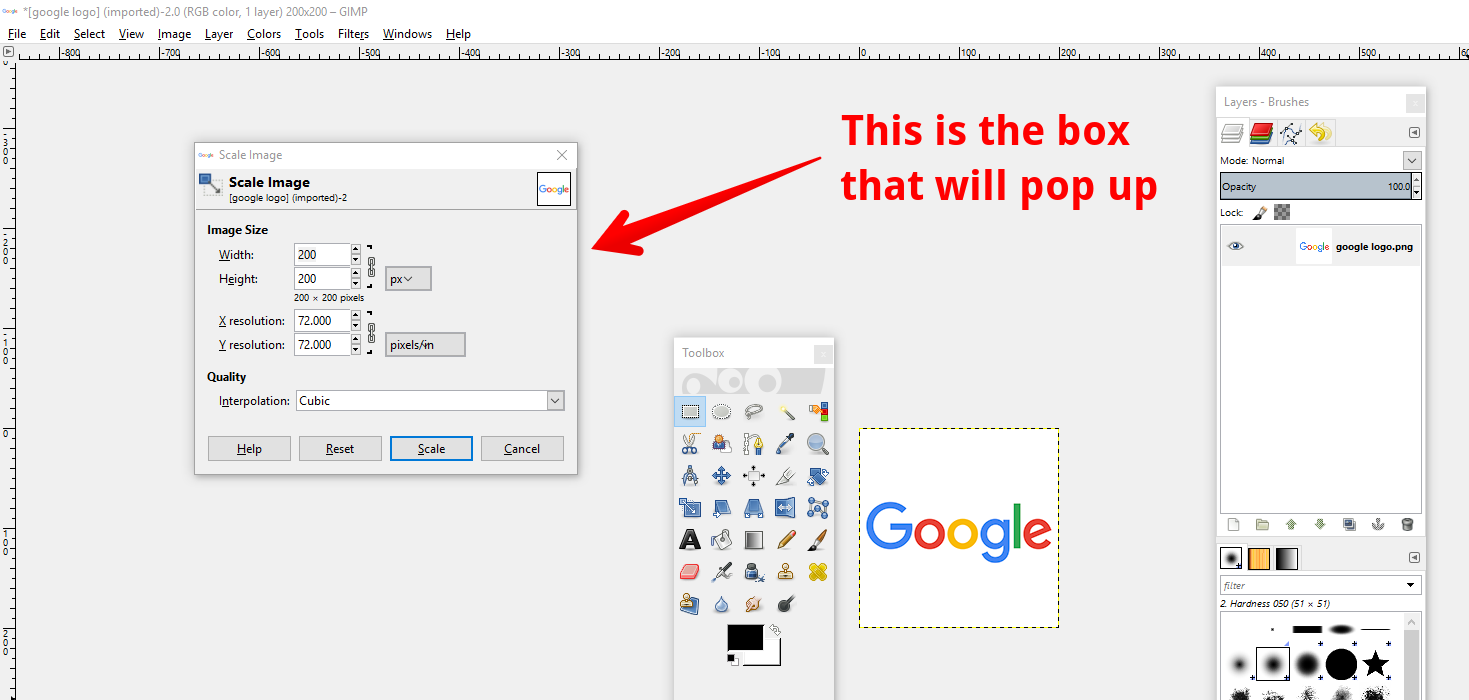
2 Change the image in the dialog box without losing quality
You will see a dialog after clicking “Scale Image”. Here you can enter the dimensions of the picture you wish to increase or reduce in size. This time, we will increase the size. The dialog bot should look like the image below.
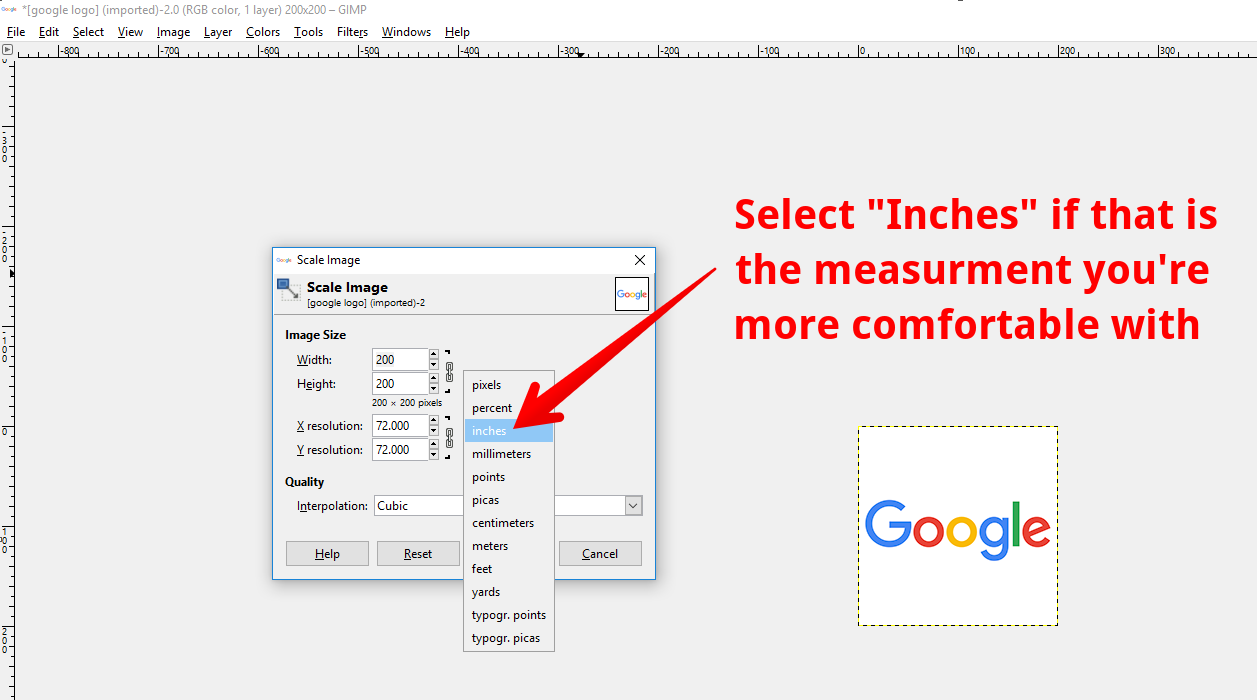
Step Optional: Switch to Inches
If you don’t know what pixels are, click the “px”. It will look like the picture below.
3 Enter new resolution and size values to change image size without losing any quality
You will now set the size of your images. Enter the number of pixels or inches you want your image to be. You’re now ready to resize your image without sacrificing quality.
Originally our image was 200×200 but we want to Its size, let’s say double it, so that would mean our new values would then be 400×400. You can use this image as a guide if you’re not sure what it means.

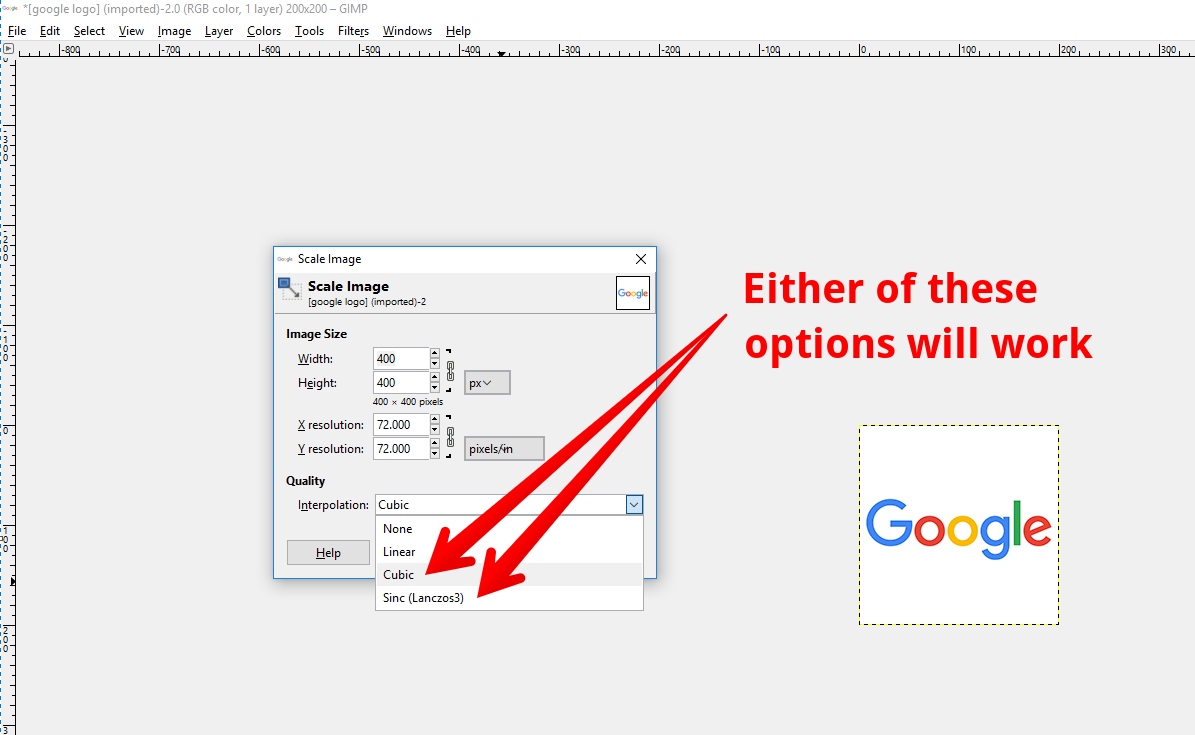
4 You can change the size of the image without affecting the quality by using interpolation.
You don’t understand what interpolation is?
You’re not alone. Most users are also trying to resize images without losing any quality.
GIMP needs to create new pixels in order to properly enlarge your image. You would end up with a pixelated image if you didn’t do this.
Cubic Option – The color of each pixel is selected based on the eight corresponding pixels around it to make up it’s color. This will typically output the The best possible image that you can getIt’s a double edged sword, because it requires a lot more time to make. This method can also be called “Bicubic”.
Sinc (lanczos3) option – This interpolation method, Lanczos3, uses a Sinc mathematical function that will go ahead and perform amazing interpolation within the image to give you a resized image without losing quality.
The image below shows where you can find the interpolation menu and how it will appear. If you want to change the size of your image without sacrificing quality, then we suggest Cubic (lanczos3) or Sinc.
5 You can change the size of an image without losing quality by clicking “Scale”.
You can now click on the scale. buttonYou can do this for multiple images and add them to your blog posts or even as static images on your homepage if you’d like. You can use this technique to add multiple images, either as static images or blog posts.
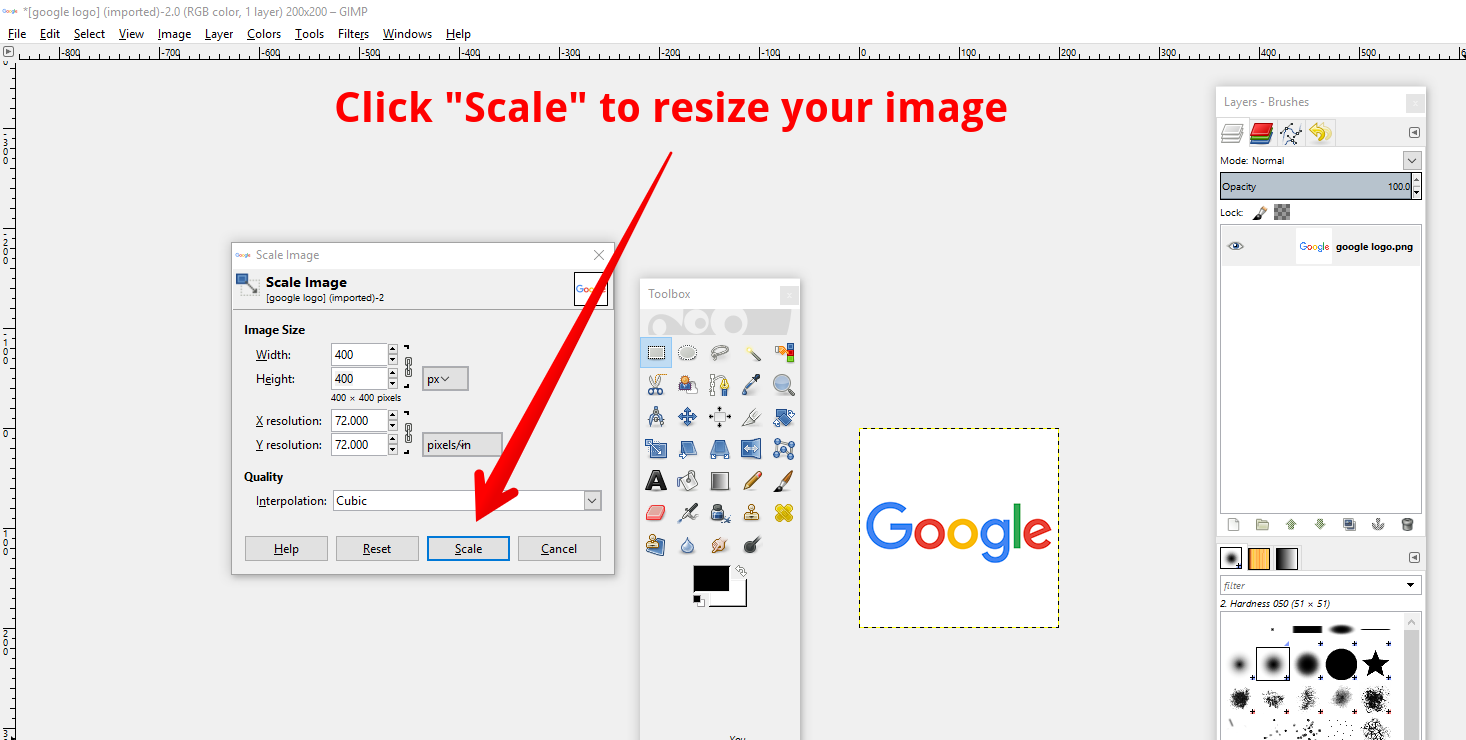
Click “Scale”, and you’ll be left with a larger image.

Many people have problems trying to increase their or decrease the size of their images You don’t need to worry about your WordPress website or blog anymore because we have provided a comprehensive guide that will show you how to do it correctly.
It is important to have high-quality images that do not look pixelated. This will help you achieve success online. Many of us have trouble resizing images without compromising quality.
We will upload an amazing image We may choose an image that we believe will be the best fit for a certain section of our website. However, the size of the picture might not allow it to fit in the chosen section.
You can now save money and headaches by using GIMP to resize images. How to make your images look perfect All your visitors should love your site or blog.
If you want to convert more visitors into buyers or newsletter subscribers, it’s important to take your design to the highest level. But if your website isn’t up to scratch, this can be a challenge. high-quality images You will lose more sales if you don’t make sure that your images are sized correctly. If you want to sell products, people will not buy from a website that doesn’t have the proper images. Edit some photos You can increase or decrease the size of your products without affecting their quality.
While optimizing images is an essential part of optimizing your WordPress website, we also recommend choosing a theme that was built from the ground up with performance in mind – check out Shoptimizer. For a WordPress or WooCommerce website to load quickly, you must optimize images. Check out if you’re looking for a theme that is built to convert and be fast. Shoptimizer!
We hope that you have learned something from our article. Please continue to read more as there is a lot of good information available.